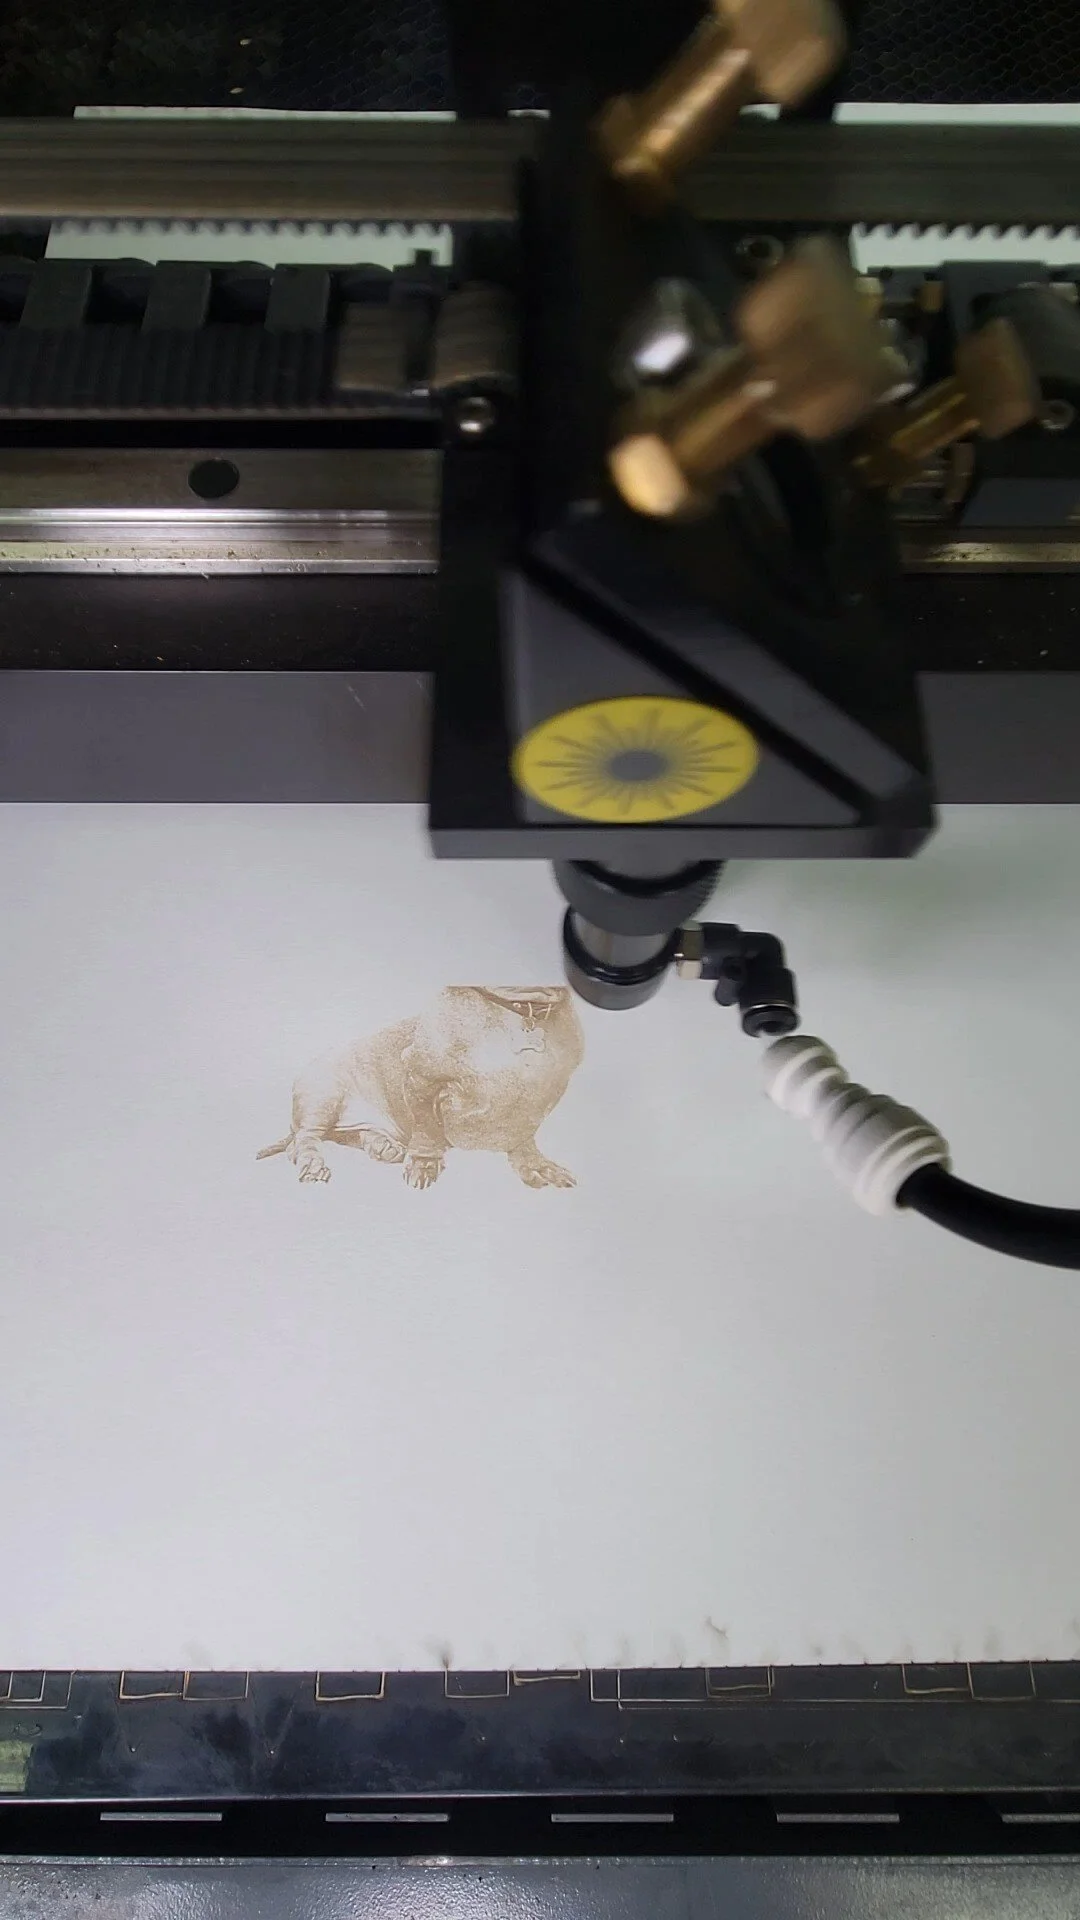

Laser 101: FAQs & Tips for Laser Cutting
New to laser cutting? Start here. We explain the basics—how CO₂ lasers cut and engrave, which materials are safe, and how to set up your file. You’ll learn the difference between cutting and engraving, why vector files matter, and simple ways to avoid burn marks or rough edges. We also cover safety, ventilation, and tips for better results. Whether you plan to rent a laser or have us do the work, this quick guide will help you make confident choices and get cleaner parts.
FAQs
- Cutting vs. engraving—what’s the difference?
Cutting goes through the material; engraving marks the surface. - Which materials are safe to cut?
Common options include acrylic, wood, cardboard, some fabrics, and other laser-safe materials. Avoid PVC and unknown plastics. - Why won’t JPEG or PNG work for cutting?
They don’t contain paths. Laser cutters need vector files like AI, DXF, or PDF. - What software should I use?
Illustrator or LightBurn are common choices. Export clean vectors at the correct scale. - Any quick tips for cleaner results?
Use the right material, nest parts to save stock, keep optics clean, and choose sensible power/speed settings.
✨ Shine Bright: Laser-Cut Glitter Acrylic Eyeglasses and Headbands
✨ Shine Bright: Laser-Cut Glitter Acrylic Eyeglasses and Headbands
New Year's Eve is all about sparkle, and nothing says celebration like custom party accessories. Laser cutting is the perfect way to produce custom eyeglasses, headbands, and bowties quickly and precisely using glitter and mirror acrylics, making for memorable photo opportunities and party favors.
This article details the materials and techniques for creating dazzling NYE wearables.
I. Choosing the Right Materials
The key to flashy NYE accessories is selecting high-impact, lightweight acrylics.
Glitter Acrylic: This is the ideal material. It is clear acrylic embedded with glitter flakes. The laser cuts through it cleanly, and the cut edges often appear polished. Purchase 1/8 inch (3mm) thick glitter acrylic in festive colors like gold, silver, or black.
Mirror Acrylic: Provides a high-gloss, reflective surface. Only use extruded mirror acrylic; cast mirror acrylic often breaks down during laser cutting. Always cut mirror acrylic with the mirrored side down to prevent the beam from reflecting back into the laser.
Headband Blanks: Save time by purchasing inexpensive plastic headband blanks. Your laser-cut designs can be quickly and easily glued to these bases.
II. Designing and Cutting Eyeglasses
Creating functional eyeglasses requires careful design to ensure the frames are comfortable and durable.
Design Files: Look for ready-to-cut Laser Cut New Year's Glasses SVG files that feature the year ("2026") or common phrases like "Happy New Year."
Creating Hinge Points: Most simple laser-cut eyeglasses are designed to be cut as one flat piece. To achieve an over-the-ear piece that bends, some designs use flex joints or living hinges cut from thinner material, while others rely on cutting the main frame and gluing on separate, straight earpieces.
Laser Settings: Since acrylic can melt and flame, use high air assist and slightly higher speed to achieve a clean, polished edge. Slow speeds can cause the acrylic to gum up and create rough edges.
III. Assembly and Finishing
Headbands: Cut your design (e.g., stars, a large "2026," or a mini top hat) from glitter acrylic and use a strong glue, such as E6000 or specific acrylic cement, to attach the design to the plastic headband blank (Source: [suspicious link removed]).
Bowties/Pins: For bowties or pins, cut the shape and glue a small metal pin back to the reverse side. This allows the accessory to be easily clipped to a shirt or jacket.
How to Get Cleaner Edges in Laser Cut Acrylic
How to Get Cleaner Edges in Laser Cut Acrylic
The Secret to a Polished, Professional Finish
Acrylic is one of the most popular materials for CO₂ laser cutting because of its precision, versatility, and ability to produce crystal-clear edges. Yet many users struggle with hazing, frosting, or melted edges that ruin an otherwise perfect cut. Getting smooth, clean results requires the right combination of machine setup, material choice, and environmental control.
1. Choose the Right Type of Acrylic
Not all acrylic reacts the same way to a laser.
Cast acrylic produces clear, flame-polished edges and engraves with crisp contrast.
Extruded acrylic cuts faster but tends to have a cloudy edge and softer engraving definition.
Pro tip: For professional projects, always use cast acrylic—it delivers more consistent optical clarity and better surface results.
2. Optimize Laser Settings
Finding the right power and speed balance is crucial.
Too much power causes melting and bubbling.
Too little power leaves uncut sections or rough edges.
Ideal setup: Medium-to-high speed with just enough power to cut cleanly through the sheet in one pass.
At American Laser Cutter, every job is calibrated to the acrylic thickness and wattage of our lasers (ranging up to 180W). That ensures full penetration without thermal distortion.
3. Maintain Proper Focus and Air Assist
A sharp focal point delivers the smoothest cut. Dirty lenses, mirrors, or improper focus can scatter the beam and cause cloudy edges.
Air assist also makes a major difference—it clears vaporized material from the cutting area and prevents re-fusing along the edges. Clean, dry air at a steady flow gives the best clarity.
4. Keep the Material Cool and Stable
Acrylic expands with heat. Continuous long cuts can cause warping or tapering if the sheet gets too hot. Use elevated supports under the sheet and consistent ventilation across the cutting bed to dissipate heat evenly.
If needed, pausing briefly between passes lets the material cool and prevents internal stress cracks.
5. Avoid Flame Polishing After Laser Cutting
While some people try to “fix” hazy edges with a torch, it can introduce stress and clouding. A properly tuned laser should already leave a flame-polished finish. Post-processing is unnecessary if the beam focus and power are set correctly.
Professional Cutting for Perfect Edges
At American Laser Cutter, we specialize in achieving optical-grade results on acrylic for signage, displays, and precision parts. Using tuned CO₂ lasers up to 4’×5’ in size, we deliver smooth, flame-polished edges straight from the machine—no sanding or polishing required.
Clients can supply their own acrylic or select from our in-house materials, available in multiple colors and thicknesses.
Conclusion
Clear, professional acrylic cuts depend on fine-tuned settings, clean optics, and the right material. When handled correctly, laser-cut acrylic edges should come out polished and perfect on the first pass.
If you need precision acrylic cutting with professional clarity, American Laser Cutter can handle your project—on-site in Los Angeles or remotely anywhere in the U.S.
Email americanlaserco@gmail.com or visit americanlaserco.com to request a quote.
Laser Cutting in Architecture and Interior Design
Here’s the next fresh, copy-ready article in the seriLaser cutting has moved well beyond the factory floor. In 2025, it is a design tool shaping how architects and interior designers create both models and finished environments. The precision, speed, and flexibility of laser technology allow professionals to realize ideas that were once too complex or costly.
Scale Models and Prototypes
Architects often begin with models to visualize projects. Laser cutters make this process faster and more detailed.
Cardboard and Paperboard Models: Quick, affordable, and precise.
Acrylic and Wood Models: Durable materials for client presentations.
Complex Facades: Intricate window grids, latticework, and textures cut cleanly.
Laser-cut models improve communication between designers, clients, and builders.
Decorative Panels and Screens
Interior designers frequently use laser cutting for functional art.
Room Dividers: Custom-cut patterns in wood or acrylic.
Wall Panels: Geometric or organic shapes for texture and style.
Lighting Fixtures: Perforated designs that create striking shadows.
These elements blend utility with aesthetics, turning simple materials into focal points.
Furniture and Fixtures
Furniture makers and designers integrate laser cutting into their workflows.
Wood Components: Chairs, shelves, and tables with precise joints.
Metal Accents: Decorative steel or aluminum inserts.
Custom Hardware: Unique pulls, handles, or brackets.
The repeatability of laser cutting ensures every piece matches perfectly, even in large runs.
Branding in Commercial Interiors
Businesses often want their spaces to reflect their identity. Laser cutting makes branding part of the environment.
Logo Cutouts: Featured in reception desks or wall panels.
Custom Signage: Consistent brand imagery throughout a space.
Unique Fixtures: Tables, counters, or shelving customized with brand motifs.
This integration strengthens brand presence for customers and employees alike.
Sustainability and Materials
Sustainability is a growing factor in architecture and design.
Recycled Materials: Acrylics and woods sourced from reclaimed stock.
Eco-Friendly Composites: Safe alternatives to hazardous plastics.
Efficient Nesting: Laser software reduces material waste.
These practices align with modern design goals of environmental responsibility.
Questions & Answers
Q1: Why do architects use laser cutting for models?
A: It allows them to produce highly detailed, accurate models quickly for review and presentation.
Q2: Can laser cutting be used for interior design features?
A: Yes, it’s popular for wall panels, lighting fixtures, and custom decorative screens.
Q3: How does laser cutting help furniture makers?
A: It creates precise joints, consistent parts, and decorative accents that are repeatable at scale.
Q4: Is laser cutting sustainable in architecture?
A: With eco-friendly materials and efficient software, it supports greener design practices.
Q5: Do commercial spaces benefit from laser cutting?
A: Absolutely. Businesses use it for branding, signage, and custom furniture to enhance their interiors.
Laser Cutting in the Fashion Industry — Style Meets Technology
Fashion thrives on innovation, and in 2025, laser cutting is one of the most powerful tools reshaping the industry. Designers now use lasers to cut fabrics, engrave leather, and create details that would be impossible with scissors or dies. The result is garments and accessories that combine artistry with cutting-edge precision.
Fabric Cutting and Pattern Making
Traditional pattern cutting is time-consuming and prone to human error. Laser cutters streamline this step.
Precision: Patterns cut with millimeter accuracy.
Efficiency: Multiple layers of fabric cut in a single pass.
Complexity: Shapes and designs that are impossible by hand become achievable.
This allows designers to focus on creativity instead of production limitations.
Leather Engraving and Customization
Leather is one of the most popular fashion materials for laser work.
Custom Logos: Brands engrave logos or monograms directly into products.
Texture Creation: Lasers etch detailed patterns, adding depth and uniqueness.
Clean Edges: Cuts are sharp and consistent, unlike blade cutting which may fray.
Laser-engraved leather bags, belts, and shoes are increasingly common in luxury markets.
Jewelry and Accessories
Beyond garments, laser cutting drives innovation in jewelry and fashion accessories.
Acrylic Jewelry: Lightweight earrings and necklaces with intricate designs.
Metal Accents: Fiber lasers cut thin metals for charms and fasteners.
Hybrid Designs: Combining fabric, acrylic, and metal for unique statements.
Accessories made with laser cutters often stand out for their detail and originality.
Sustainability in Fashion
The fashion industry faces pressure to become more sustainable, and laser cutting helps:
Reduced Waste: Tight nesting of patterns maximizes fabric use.
No Tooling Waste: Unlike die cutting, no molds or blades are discarded.
Eco-Friendly Materials: Designers experiment with biodegradable fabrics.
This aligns with consumer demand for greener fashion choices.
High Fashion Meets Mass Market
Luxury designers showcase laser-cut gowns and footwear on runways, while mass-market brands adopt the same technology for affordability. From haute couture to everyday streetwear, laser cutting bridges both ends of the fashion spectrum.
Questions & Answers
Q1: What fabrics can be laser cut in fashion?
A: Cotton, silk, polyester blends, felt, and many synthetics cut cleanly with lasers.
Q2: Why is laser cutting used on leather?
A: It produces sharp cuts and allows detailed engraving for customization.
Q3: Is laser cutting sustainable in fashion?
A: Yes. It reduces fabric waste and supports the use of eco-friendly materials.
Q4: Do luxury designers use laser cutting?
A: Absolutely. Many couture pieces now feature intricate laser-cut patterns.
Q5: Can accessories be made with laser cutting?
A: Yes. Jewelry, belts, bags, and shoes all benefit from laser-cut details.
😂 Silly Season Swag: Funny Laser-Cut Wine Charms and Gag Gift Boxes
😂 Silly Season Swag: Funny Laser-Cut Wine Charms and Gag Gift Boxes
The laser cutter isn't just for elegant keepsakes; it's a fantastic tool for creating unique, humorous, and irreverent items perfect for lighthearted holiday fun. Gag gifts and witty accessories are quick to make, easy to personalize, and are fantastic impulse buys.
This article focuses on using the laser for these fun, non-traditional Christmas projects.
I. Witty Accessories for Holiday Parties
Add some laughter to your gathering with personalized accessories that break the ice.
Funny Wine/Drink Charms: These are fast to cut and engrave from small scraps of acrylic or thin wood. Engrave short, humorous phrases that relate to the season or drinking culture, such as "Stole Santa's Wine" or "Ho Ho Hold My Beer".
Sarcastic Coasters: Design a set of engraved slate or wood coasters with witty sayings about holiday stress or famous Christmas movie quotes. These are a great way to use up 4x4-inch material squares.
Bad Santa Trophies: Create a tongue-in-cheek "award" for the "Worst Gift Giver" or "Ugliest Sweater" using cheap, bright acrylic and a simple layered design. These can be designed with a simple Laser Cut Trophy SVG
II. Custom Gag Gift Presentation
Make the packaging of an awful or hilarious gift part of the joke.
Laser-Cut "Coal" Boxes: Create a small, black-painted wooden box engraved with a naughty list name and fill it with literal coal lumps or charcoal briquettes
Puzzle Gift Card Holders: Design a simple laser-cut box with a clear acrylic window that requires the recipient to solve a small, interlocking puzzle before they can retrieve the gift card inside. Look for Laser Cut Gift Card Holders files that incorporate slots or screws (Source: Laser Cut Gift Card Holders - Etsy).
"Emergency" Kits: Engrave small wooden boxes to look like an official "Emergency Christmas Survival Kit" or "Break in Case of Holiday Stress" box. The box can be filled with mini liquor bottles, chocolate, or pain relievers.
III. Novelty and Prank Items
Faux Mistletoe: Cut a simple wooden mistletoe shape from thin wood and engrave a humorous message on it, like "Kiss Me, I'm Desperate" (Source: Christmas Mistletoe Sign Laser Cut File - Etsy).
Ugly Sweater Accessories: Cut out miniature ugly sweater shapes from wood and engrave them with truly awful holiday graphics. These can be used as magnets or small pins
📈 From Hobby to Holiday Hype: Top 5 Bestselling Christmas Items for Your Etsy Shop
📈 From Hobby to Holiday Hype: Top 5 Bestselling Christmas Items for Your Etsy Shop
Turning your laser hobby into a holiday business requires focusing on products that are high-demand, easy to personalize, and simple to ship. Etsy, in particular, rewards unique, high-quality, and customizable items.
Here are the top 5 bestselling laser-cut Christmas items that drive high sales volume:
1. Personalized Family Name Ornaments
Why they sell: They are a timeless keepsake that people buy every year for their own families or as gifts. High demand means you can run a single file with minor text changes for high efficiency.
Best Sellers: [suspicious link removed] (Source: Etsy), Family Name Plaques (circular or rectangular), and designs featuring the year
Material: Thin Baltic Birch plywood (1/8" or 3mm) is inexpensive, ships flat, and is easy to paint or stain.
2. Custom Engraved Cutting Boards
Why they sell: They are high-value gifts perfect for housewarmings, weddings, and couples. They offer a large surface area for detailed personalization (e.g., family recipes or crests).
Best Sellers: Walnut and Bamboo Charcuterie Boards engraved with "The [Family Name] Est. [Year]" (Source: Etsy) or a custom handwritten recipe.
Material: Maple, Walnut, or Bamboo (Bamboo is cost-effective but requires lower power to avoid scorching).
3. Christmas Village & Nativity Scene Kits
Why they sell: These offer a multi-part assembly project that appeals to both kids and adults. Selling them as kits allows for flat-pack shipping, which drastically reduces costs.
Best Sellers: 3D Wooden Christmas Village House Sets (Source: Etsy) or layered Nativity Scene sets
Material: MDF or 3mm plywood, allowing pieces to slot together tightly without glue (often called "tab and slot" designs).
4. Personalized Gift Tags
Why they sell: They are a great, low-cost impulse buy or an easy add-on sale for existing ornament orders. They use up scrap wood and acrylic efficiently.
Best Sellers: Tags cut into shapes like reindeer, snowflakes, or simple script names
Material: Scrap acrylic or 1/8" plywood.
5. Engraved Faux Leather/Cork Coasters
Why they sell: Coasters are highly practical and easy to batch-process in large numbers (sets of 4 or 6). Faux leather provides high-contrast engraving that looks premium.
Best Sellers: Faux Leather Coasters with a single holiday graphic (Source: Etsy) or personalized family name and initial designs.
Material: Faux Leather (Leatherette) or Cork (very fast and clean to engrave).
The next article idea is: Silly Season Swag: Funny Laser-Cut Wine Charms and Gag Gift Boxes.
💻 Design Like a Pro: Creating Seamless SVG Ornament Files in LightBurn
💻 Design Like a Pro: Creating Seamless SVG Ornament Files in LightBurn
For those selling laser-cut items or seeking professional-grade results, mastering the design software is essential. LightBurn is one of the most popular programs for laser control, offering powerful vector editing tools necessary for creating clean, perfectly interlocking ornament files.
This article focuses on the key steps and features within LightBurn needed to design a seamless, ready-to-cut ornament.
I. Understanding the File Format: SVG
Why SVG? Scalable Vector Graphics (SVG) files are the standard for laser cutters because they use mathematical paths rather than pixels. This allows you to scale the ornament to any size without losing sharpness or detail.
Vector vs. Engrave: Ensure the outer boundary of your ornament and any internal cutouts are defined as Vector Paths (set to "Line" or "Cut" in LightBurn) and not raster images (set to "Fill" or "Engrave").
II. Essential LightBurn Tools for Ornament Design
These tools ensure your ornament is structurally sound and easy to assemble:
Offset Tool: Critical for creating clean borders, internal mats, or ensuring parts fit together. If you want a decorative border around an engraved name, use the Offset Tool to generate a perfect path around the text
Boolean Tools (Weld, Subtract, Intersect): These are vital for creating complex shapes from simple ones.
Use Weld (Union) to combine two shapes into one seamless piece, such as merging a hanger hole onto the top of a reindeer silhouette.
Use Subtract (Difference) to cut one shape completely out of another, such as carving a name or a slot out of a background shape
The Kerf Adjustment: If you are designing layered or interlocking ornaments, the Kerf Offset feature in LightBurn is essential. Kerf is the tiny amount of material the laser vaporizes away during the cut. Adjusting the kerf compensates for this loss, ensuring interlocking tabs fit tightly without sanding or glue
III. Creating the Perfect Hanger Hole
Size: A 3mm to 4mm hole is generally sufficient for threading ribbon or twine.
Placement: Use the Center Point feature to ensure the hole is centered horizontally on the ornament's strongest upper point. This prevents the finished ornament from hanging crookedly on the tree (Source: [suspicious link removed]).
Final Check: Use the Preview Window (often accessed by clicking the monitor icon) before saving or cutting. This shows you exactly how the laser will run, helping you catch any unclosed vector paths or overlaps (Source: Preview Window - LightBurn Software Documentation).
🎁 Beyond the Bow: Custom Laser-Cut Gift Tags and Presentation Boxes
🎁 Beyond the Bow: Custom Laser-Cut Gift Tags and Presentation Boxes
The presentation of a gift is often as memorable as the gift itself. Laser cutters are the ultimate tool for creating custom, professional-grade gift packaging, transforming simple paper goods and plain boxes into personalized holiday treasures.
This article focuses on using your laser to design and cut unique gift tags and structural presentation boxes.
I. The Art of the Custom Gift Tag
Moving beyond basic card stock, laser-cut tags are durable keepsakes that recipients often reuse as ornaments.
Materials: Thin Baltic Birch plywood (3mm or 1/8 inch) is ideal for sturdiness, offering a rustic look that can be painted or stained. For a modern aesthetic, colored or mirror acrylic works well and can be easily engraved with a permanent marker
Design Ideas:
Monogram Tags: Simple circular or rectangular tags engraved with a single large initial
Themed Scrollwork: Intricate tags cut in the shape of reindeer antlers, mistletoe, or decorative snowflakes
Two-Part Tags: Design a tag with a cutout that reveals a contrasting layer of colored cardstock or felt glued behind it, making the design truly pop.
II. Structural Presentation Boxes
Creating a custom box for a specialty item (like wine, jewelry, or a homemade candle) elevates the gift instantly.
Box Construction: Look for SVG or DXF files for laser-cut boxes that are designed using interlocking finger or slot joints (Source: [suspicious link removed]). These designs are cut from flat material and snap together without needing complex glue or fasteners.
Best Materials: MDF or thin plywood (3mm or 1/8 inch) are best for structural integrity. The joints will hold firmly, and the surface is easy to engrave for personalization.
Specialty Holders: Design specific internal inserts or dividers for fragile items. You can find files for a Laser Cut Wine Bottle Box SVG with a custom lid or a small, decorative Christmas-themed jewelry box (Source: Laser Cut Jewelry Box with Drawers - Etsy).
III. Finishing Touches for Impact
Engrave the Card: For boxes, use the laser to engrave the recipient's name or a heartfelt message directly onto the lid (Source: [suspicious link removed]).
Ribbon Slits: Design small, thin slots into the sides or top of the box to easily thread ribbon, eliminating the need for punching holes.
Use Draftboard: For temporary or extremely intricate boxes, Draftboard (low-cost MDF) is excellent for fast cutting and prototyping
Best Materials for CO₂ Laser Cutting and Engraving
Best Materials for CO₂ Laser Cutting and Engraving
Choosing the Right Material for Professional Results
Not every material reacts the same way to a laser beam. Some cut cleanly with perfect edges, while others burn, melt, or release unsafe fumes. Knowing which materials work best with CO₂ laser systems ensures precision, consistency, and safety—whether you’re creating signage, prototypes, or production components.
Top Materials for Laser Cutting
Acrylic (Cast and Extruded)
Cuts: Cleanly with flame-polished edges
Engraves: Smoothly with sharp contrast
Applications: Signage, awards, retail displays, lighting panels
Tip: Cast acrylic engraves better than extruded for crisp detail
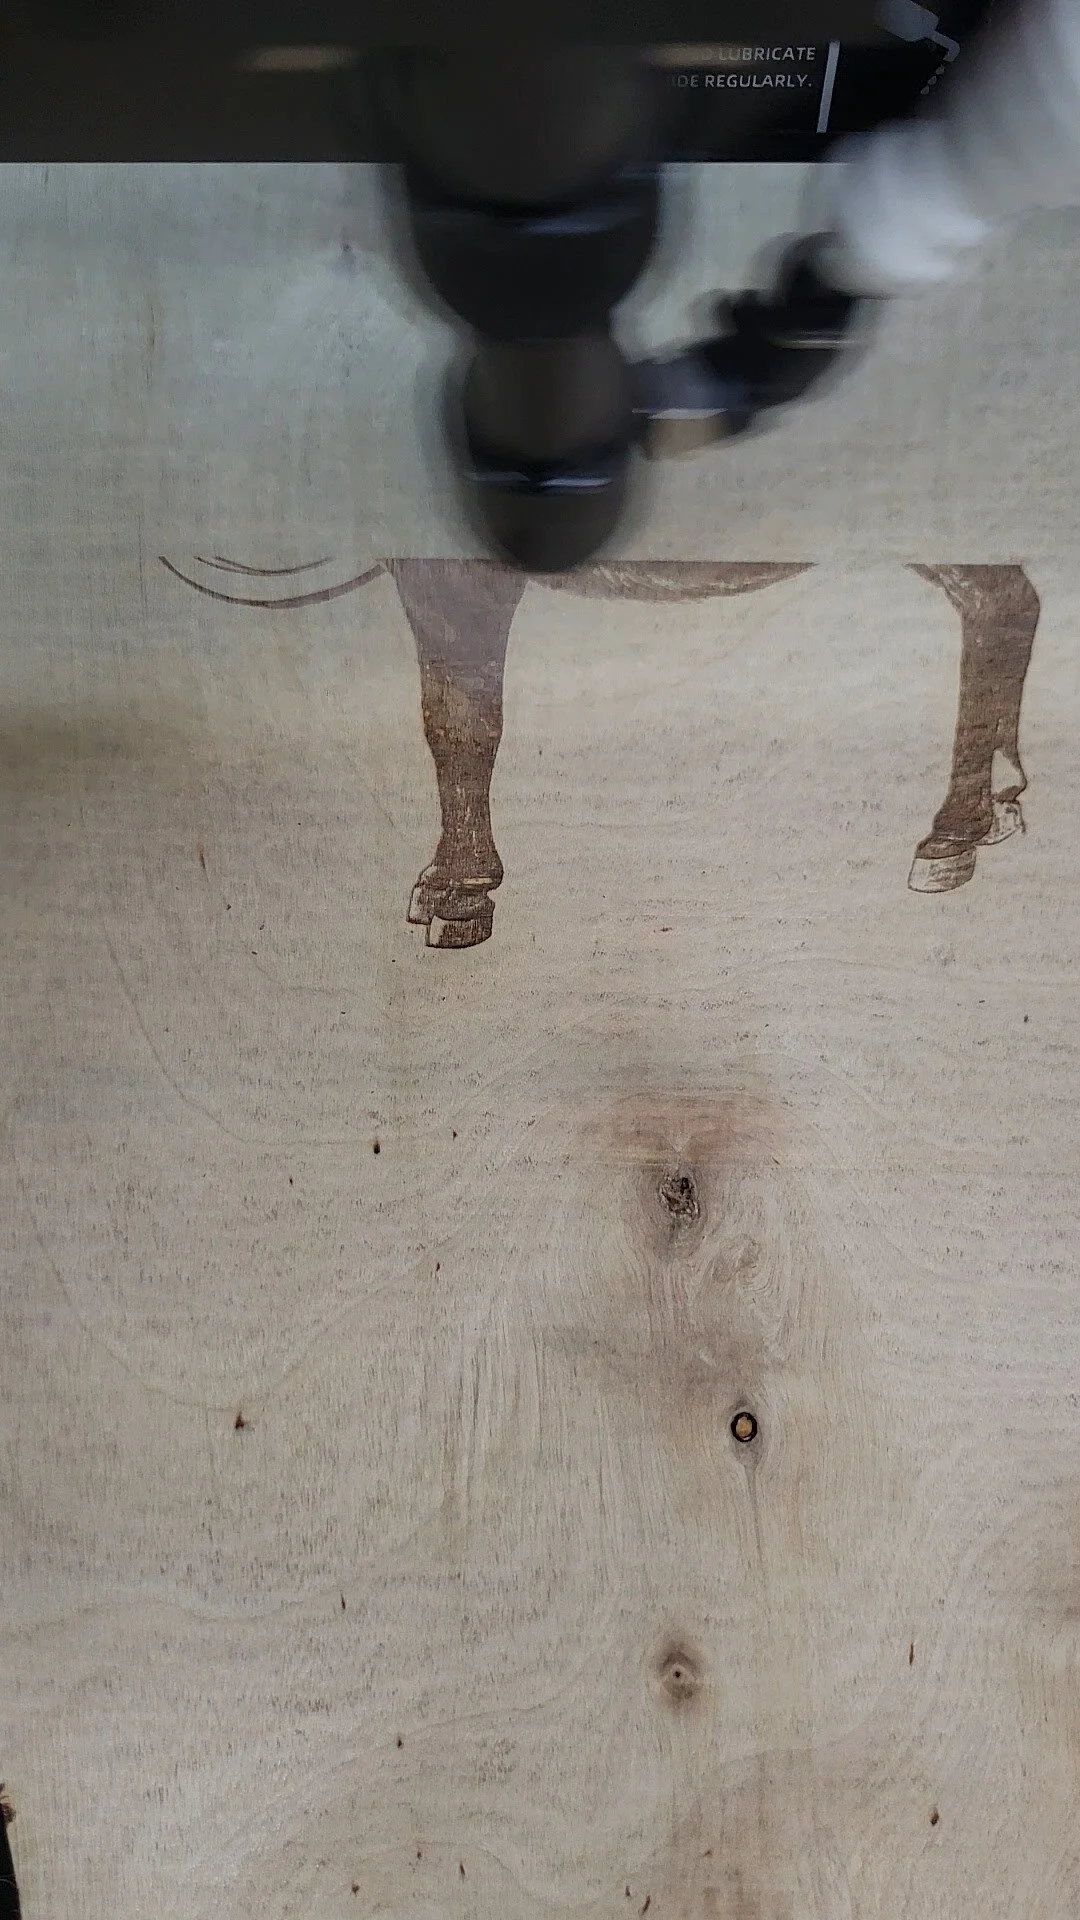
Birch and Other Plywoods
Cuts: Cleanly with some edge darkening
Engraves: With excellent tonal range
Applications: Models, decor, product packaging, art pieces
Tip: Choose high-quality laser-safe ply—cheap alternatives may contain glue layers that burn inconsistently.
Hardwoods
Cuts: More slowly but with rich color and depth
Engraves: Dark, textured marks with high contrast
Applications: Custom furniture parts, signage, craft goods
Tip: Consistency varies by grain density—test before large runs.
Paperboard and Cardstock
Cuts: Quickly and accurately with minimal burn
Engraves: Subtly, perfect for pattern work
Applications: Packaging, stencils, invitations, prototypes
Tip: Use air assist to prevent edge scorching.
Leather (Genuine or Laser-Safe Synthetic)
Cuts: Cleanly with sealed edges
Engraves: With dark, high-contrast surface markings
Applications: Branding, accessories, signage, decor
Tip: Only cut verified laser-safe synthetics—PVC or vinyl-based materials are unsafe.
Delrin (Acetal)
Cuts: With smooth, durable edges
Engraves: Precisely without residue
Applications: Mechanical parts, jigs, and gaskets
Tip: Emits a mild odor when cut—use proper ventilation.
Materials to Avoid
Some materials release toxic fumes or damage the machine:
PVC and Vinyl: Produce corrosive chlorine gas
Polycarbonate: Discolors, melts, and emits harmful smoke
ABS Plastic: Melts and gives off cyanide gas
Fiberglass: Burns unpredictably and ruins optics
If unsure, always confirm your material’s safety with a technician before cutting.
How American Laser Cutter Handles Materials
We cut and engrave a wide range of laser-safe materials daily, from acrylic and wood to specialty plastics. Clients are welcome to supply their own material or choose from our in-house selection. Each job runs on calibrated CO₂ lasers with power levels optimized for clarity, edge quality, and minimal residue.
Conclusion
Selecting the right material is critical for quality, safety, and appearance. Acrylic delivers precision and clarity, while wood provides texture and warmth—each suited to specific creative goals.
For professional cutting and engraving across multiple materials, American Laser Cutter can help—on-site in Los Angeles or remotely anywhere in the U.S.
Email americanlaserco@gmail.com or visit americanlaserco.com to start your next project.
🧣 Elegant Etchings: Personalized Leather and Felt Stockings
🧣 Elegant Etchings: Personalized Leather and Felt Stockings
Laser cutting and engraving are perfect for creating custom Christmas stockings and tags that become cherished, long-lasting keepsakes. Instead of temporary vinyl or embroidery, a laser creates a permanent, high-contrast mark that adds a premium feel to soft goods.
This article focuses on using the laser for both personalization and construction.
I. The Power of Personalized Tags (Faux Leather)
Faux leather (often called leatherette) is the ideal material for engraving names and designs, as it provides sharp contrast and is durable.
Why Faux Leather? Unlike genuine leather, laser-safe faux leather (free of PVC/vinyl) is inexpensive, cuts cleanly, and often reveals a metallic or light-colored layer underneath the surface when engraved. For instance, the engraving on the popular Rustic/Dark Faux Leather often comes out in a gorgeous gold or silver color, providing high contrast (Source: Personalized Christmas Stocking Tags - Leather Tags - APKhome).
The Project: Create Personalized Faux Leather Stocking Tags that are cut to size (e.g., 5" x 2") and include a grommet and cord for hanging (Source: Personalized Christmas Stocking Tags - Custom Laser Engraved Faux Leather Name Tags With Hanging Cord).
Best Practice: When engraving, the laser creates a dark mark by burning the surface material. Use masking tape around the design area to protect the leather from soot and charring (Source: [suspicious link removed]).
II. Creating Custom Felt Stockings
Felt is a versatile material for laser cutting. It can be used to cut the entire stocking shape or delicate appliqué pieces.
The Material: 100% Polyester Felt is highly recommended for laser cutting. The laser cleanly seals the edges as it cuts, preventing fraying, which is a common problem with traditional cutting methods (Source: Make your own laser cut felt Christmas boot. USA).
Felt Appliqué: The quickest method is to cut out intricate designs—like snowflake shapes, animal silhouettes, or letters—from colored felt using your laser and then sewing or gluing them onto a pre-made stocking.
The Cut: You can use an SVG laser cut file to create an entire miniature stocking gift card holder or a full-sized stocking shape from 4mm felt (Source: Laser Cutting Felt Stockings - YouTube).
III. Direct Engraving on Stockings
If you have a flat-bed laser and a coated fabric stocking, you can engrave directly onto the material for a crisp, permanent result.
Testing is Key: Only attempt this on smooth-surfaced, coated fabrics or faux leather stockings. Avoid velvet or shaggy felt, as these materials can be damaged or melted by the laser (Source: How to Personalize a Christmas Stocking: The Ultimate Guide 2026 - LaserPecker).
Flatness: Ensure the stocking is laid perfectly flat and secured in your laser bed to prevent the laser head from catching the material during the job (Source: [suspicious link removed]).
💡 Illuminating the Holidays: Laser Engraving Acrylic for Custom LED Night Lights
💡 Illuminating the Holidays: Laser Engraving Acrylic for Custom LED Night Lights
Laser-engraved acrylic lamps are a fantastic way to create a modern, glowing piece of holiday decor or a highly personalized gift. The technique, known as edge-lighting, works by engraving a design onto a clear acrylic panel. When the LED base shines light up into the edge of the panel, the light travels through the material and illuminates only the frosted, engraved lines, creating a striking 3D illusion.
Here is a guide to creating these custom acrylic night lights:
I. Choosing Your Materials
The type of acrylic you choose is the single most important factor for success.
Acrylic Type: Always use Cast Acrylic (PMMA) for engraving (Source: Cast Clear Acrylic Sheet for Laser Cutting & Engraving - 1/16 - MakerStock). Cast acrylic produces a beautiful frosted, white engraving that contrasts perfectly with the clear material, which is necessary for the lighting effect. Extruded acrylic tends to melt and result in a less visible, transparent mark (Source: Laser Engraving on Acrylic: The Art of Transparency).
Thickness: 3mm (1/8 inch) clear acrylic is ideal, as it is durable yet thin enough to fit most commercially available USB Wood Lampholders with Built-in LED Bases (Source: How to Make an Acrylic Laser Cut Lamp – Easy DIY Project - OneLaser).
LED Base: Purchase a premade wooden or plastic LED Light Base (Source: Led Base Laser File - Etsy) that has a slot sized to accept your acrylic's thickness.
II. The Laser Engraving Process
The goal is to engrave the design on the back side of the acrylic for a smoother finish and better light effect.
Prepare the Design: Create or import your Christmas design (e.g., a family portrait, a snowman, or a festive quote).
Mirror the Image: Before engraving, mirror the entire design horizontally (Source: How to Laser Engrave an Acrylic Night Light- easy Money $$ with your Thunder Laser - YouTube). This ensures that when you engrave the back, the image will appear correctly oriented and smooth when viewed from the front.
Engrave First, Then Cut: Run the engraving job first using high speed and low power to achieve a frosted finish without melting the acrylic. Then, cut the outline of your shape (including the tab that fits into the base) (Source: How to Laser Cut Light with 4 Easy Steps - OneLaser).
Tip for Diode Lasers: If you are using a lower-power diode laser, which may struggle with clear materials, you can coat the engraving area with a black marker or use a piece of black cardstock underneath the acrylic to help the laser absorb light and etch the surface (Source: Clear Acrylic Laser Engraving Guide: Tips, Tools & Project Ideas - LaserPecker).
III. Final Assembly
No glue is needed if your tab and base slot are matched correctly.
Clean the Panel: Peel off any protective film and clean the acrylic gently using a soft cloth and isopropyl alcohol to remove dust and residue.
Insert and Light Up: Slide the tab on the acrylic panel into the slot on your LED base (Source: How to Laser Cut Light with 4 Easy Steps - OneLaser). Plug in the base to see your design illuminated!
Laser Cutting for Packaging — Precision Meets Branding
Packaging has always been more than a container. It’s the first impression of a product, the physical extension of a brand. In 2025, laser cutting is transforming how companies design, prototype, and produce packaging. From intricate cutouts to custom inserts, laser technology enables packaging that is both functional and visually striking.
Why Use Laser Cutting for Packaging
Traditional packaging methods often require expensive tooling or dies. Laser cutting removes that barrier.
Cost-Effective for Short Runs: No tooling means small quantities are affordable.
Rapid Prototyping: Brands can test and refine designs quickly.
High Precision: Logos, patterns, and shapes are cut cleanly.
Customization: Personalized packaging for limited editions or events.
Types of Laser-Cut Packaging
Custom Boxes
Cardboard and paperboard are ideal for laser cutting. Companies can create unique structural designs with windows, slots, and decorative edges.
Inserts and Liners
Foam, cardboard, or felt inserts cut by lasers protect fragile products while fitting perfectly to the item’s shape.
Decorative Elements
Patterns cut into sleeves or box tops add luxury appeal. Intricate detailing that once required costly embossing can now be achieved with a laser.
Materials for Packaging
Cardboard and Paper: Lightweight, affordable, and recyclable.
Acrylic: Used for luxury boxes and retail displays.
Foam: Perfect for inserts that hold items securely.
Fabrics: Occasionally used for decorative packaging covers.
Each material has its own cutting settings, but all benefit from the precision of lasers.
Branding Advantages
Laser cutting allows packaging to double as a marketing tool:
Logo Integration: Directly cut into or engraved on the packaging.
Personalization: Names or messages for special events or customers.
Limited Editions: Unique packaging that differentiates seasonal or promotional products.
In competitive markets, packaging that stands out can make the difference between being noticed and being overlooked.
Environmental Considerations
Eco-conscious packaging is a growing priority. Laser cutting supports this by:
Reducing waste through precise nesting of shapes.
Enabling the use of recyclable and biodegradable materials.
Eliminating the need for additional dyes or inks in many cases.
This makes laser cutting appealing to brands that want sustainability to be part of their identity.
Questions & Answers
Q1: Why is laser cutting good for packaging prototypes?
A: It allows rapid iteration without tooling costs, letting brands test designs quickly.
Q2: Can lasers cut both paper and foam for inserts?
A: Yes, with proper settings, lasers handle cardboard, paperboard, and foam for secure product packaging.
Q3: How does laser packaging help with branding?
A: Logos, cutouts, and custom designs enhance the visual impact and reinforce brand identity.
Q4: Is laser-cut packaging eco-friendly?
A: It can be, especially when using recyclable materials and minimizing waste through precise cuts.
Q5: What industries use laser-cut packaging most?
A: Retail, cosmetics, electronics, luxury goods, and food packaging all benefit from laser customization.
🏡 Laser-Cut Gingerbread Houses: A Step-by-Step Guide to Building Your Edible Masterpiece
🏡 Laser-Cut Gingerbread Houses: A Step-by-Step Guide to Building Your Edible Masterpiece
Laser cutting offers a fun, clean way to create a structural, permanent gingerbread house that can be reused year after year. By using materials like wood or acrylic, you eliminate the stress of crumbling walls and uneven baking, replacing them with precision-cut, easy-to-assemble pieces.
This article details how to leverage your laser cutter for this traditional holiday project, focusing on wood kits that can be decorated like real gingerbread.
I. Materials for Your Faux Gingerbread House
Instead of dough, you'll be using durable, easy-to-decorate materials:
Plywood or MDF: These are the most common and cost-effective materials. Most digital files are designed for common thicknesses like 3mm (1/8 inch) or 4mm (Source: Laser Cut Ginger Bread Christmas Village Houses Glowforge - Design Bundles). Plywood offers a natural look that mimics the golden-brown color of baked gingerbread.
Acrylic: For a modern, stylized look, use acrylic or plexiglass (Source: Holiday Gingerbread House Laser Cut - Svg Ocean). White or clear acrylic pieces can be decorated with bright vinyl or paint markers.
Lights: Many digital plans include a cutout or opening to fit a battery-operated tea light or string lights (Source: Gingerbread House Laser SVG files - So Fontsy), turning the house into a festive nightlight.
II. The Laser Cutting Process
The key to a successful structural project is accuracy, especially with the connecting tabs and slots.
Design Files: Look for SVG or DXF files specifically labeled for laser cutting. Many marketplaces offer individual 3D Gingerbread House files or complete Christmas Village Gingerbread House Bundle sets (Source: Gingerbread Laser Cut Files Svg - Etsy).
Check Material Thickness: Always use the slot tester file included with your digital design (if available) to ensure the file's slot widths match the exact thickness of your wood. If they don't, you may need to adjust the slot size in your design software to ensure a tight fit (Source: Gingerbread House Laser SVG files - So Fontsy).
Scoring for Decoration: When processing the walls, use the Score function (a light etch) to create the "icing" or "shutter" details onto the walls. This provides an outline for painting or decorating later.
III. Assembly and Decoration
For wood or acrylic kits, you'll replace edible icing with permanent adhesive and decorative sealants.
Assembly: Use strong wood glue or CA glue to secure the tab-and-slot joints. Kits designed with interlocking pieces should slot together easily, but glue ensures permanence. If your material is MDF, MDF Laser Cut Gingerbread House Kits often slot together for easy assembly (Source: MDF Laser Cut Gingerbread House Kit Christmas Craft Kit 3d Build Your Own | eBay).
The "Icing" Effect: Use white caulk or a thick white paint (like dimensional paint) applied with a piping bag to mimic the look of royal icing along the roofline, window frames, and seams.
Candy Decoration: Glue on small plastic or wood cutouts, beads, or other decorative elements (Source: LASER CUT FAUX GINGERBREAD HOUSE FROM CARDBOARD - YouTube). For a truly permanent decoration, look for gingerbread man SVG paint kits that can be laser-cut from wood and painted before being attached to the house (Source: Lasercut Gingerbread - Etsy).
Best Materials for CO₂ Laser Cutting and Engraving
Best Materials for CO₂ Laser Cutting and Engraving
Choosing the Right Material for Professional Results
Not every material reacts the same way to a laser beam. Some cut cleanly with perfect edges, while others burn, melt, or release unsafe fumes. Knowing which materials work best with CO₂ laser systems ensures precision, consistency, and safety—whether you’re creating signage, prototypes, or production components.
Top Materials for Laser Cutting
Acrylic (Cast and Extruded)
Cuts: Cleanly with flame-polished edges
Engraves: Smoothly with sharp contrast
Applications: Signage, awards, retail displays, lighting panels
Tip: Cast acrylic engraves better than extruded for crisp detail
Birch and Other Plywoods
Cuts: Cleanly with some edge darkening
Engraves: With excellent tonal range
Applications: Models, decor, product packaging, art pieces
Tip: Choose high-quality laser-safe ply—cheap alternatives may contain glue layers that burn inconsistently.
Hardwoods
Cuts: More slowly but with rich color and depth
Engraves: Dark, textured marks with high contrast
Applications: Custom furniture parts, signage, craft goods
Tip: Consistency varies by grain density—test before large runs.
Paperboard and Cardstock
Cuts: Quickly and accurately with minimal burn
Engraves: Subtly, perfect for pattern work
Applications: Packaging, stencils, invitations, prototypes
Tip: Use air assist to prevent edge scorching.
Leather (Genuine or Laser-Safe Synthetic)
Cuts: Cleanly with sealed edges
Engraves: With dark, high-contrast surface markings
Applications: Branding, accessories, signage, decor
Tip: Only cut verified laser-safe synthetics—PVC or vinyl-based materials are unsafe.
Delrin (Acetal)
Cuts: With smooth, durable edges
Engraves: Precisely without residue
Applications: Mechanical parts, jigs, and gaskets
Tip: Emits a mild odor when cut—use proper ventilation.
Materials to Avoid
Some materials release toxic fumes or damage the machine:
PVC and Vinyl: Produce corrosive chlorine gas
Polycarbonate: Discolors, melts, and emits harmful smoke
ABS Plastic: Melts and gives off cyanide gas
Fiberglass: Burns unpredictably and ruins optics
If unsure, always confirm your material’s safety with a technician before cutting.
How American Laser Cutter Handles Materials
We cut and engrave a wide range of laser-safe materials daily, from acrylic and wood to specialty plastics. Clients are welcome to supply their own material or choose from our in-house selection. Each job runs on calibrated CO₂ lasers with power levels optimized for clarity, edge quality, and minimal residue.
Conclusion
Selecting the right material is critical for quality, safety, and appearance. Acrylic delivers precision and clarity, while wood provides texture and warmth—each suited to specific creative goals.
For professional cutting and engraving across multiple materials, American Laser Cutter can help—on-site in Los Angeles or remotely anywhere in the U.S.
Email americanlaserco@gmail.com or visit americanlaserco.com to start your next project.
10 Everyday Objects You Didn’t Know Were Laser Cut
When people think of laser cutting, they often picture industrial parts or custom signage. But in reality, lasers shape many of the objects we interact with daily. From packaging to furniture, laser cutters leave their invisible signature everywhere. Here are ten surprising items that often come from a laser.
1. Greeting Cards
Many premium greeting cards use laser-cut details for lace-like edges or pop-up features. The precision adds elegance and uniqueness that regular die cutting can’t match.
2. Jewelry and Accessories
Lightweight earrings, pendants, and even watch straps often start with laser-cut acrylic or metal. The detail possible makes designs both fashionable and affordable.
3. Phone Cases
Custom wood or acrylic phone cases frequently feature laser-engraved logos, patterns, or cutouts. It’s how small brands create boutique products without mass manufacturing.
4. Furniture Accents
From intricate chair backs to decorative lamp shades, furniture often incorporates laser-cut wood or metal components. Designers rely on lasers for repeating patterns and consistency.
5. Packaging Inserts
That perfectly shaped foam or cardboard insert in electronics boxes? Often laser cut for a snug, protective fit. It ensures your gadgets arrive safely.
6. Clothing Details
Some high-end fashion items use laser cutting to create fabric cutouts, logos, or distressed textures on denim and leather. It’s a precise, modern version of tailoring.
7. Home Décor
Wall art, coasters, mirrors, and clocks often use laser cutting for shapes and engraved designs. Even stores like IKEA include laser-cut elements in décor lines.
8. Toys and Puzzles
Wooden puzzles, board game pieces, and even dollhouse furniture often rely on laser cutting for accuracy and safety. It ensures smooth edges without splinters.
9. Musical Instruments
Some guitar inlays, drum shells, and wooden instrument parts are laser cut for precision. Even custom picks can be engraved with logos or text.
10. Kitchenware
From engraved cutting boards to stainless steel utensils, laser technology adds both function and personalization. Brands use it to mark logos, recipes, or designs.
Questions & Answers
Q1: Are greeting cards really laser cut?
A: Yes, premium cards often use lasers for lace-like designs or pop-up structures.
Q2: How does laser cutting appear in furniture?
A: It creates decorative panels, lamp shades, and repeatable patterns.
Q3: Why use laser cutting for packaging?
A: Foam and cardboard inserts can be customized quickly for snug fits.
Q4: Do musical instruments use lasers?
A: Yes, especially for inlays, shell cuts, and decorative engraving.
Q5: What’s the biggest benefit of lasers in everyday objects?
A: Precision, consistency, and the ability to make unique designs affordably.
Laser Cutting in Education — Teaching Design and Innovation
Laser cutting isn’t just for businesses or hobbyists. Schools, universities, and makerspaces are adopting it as a tool for teaching creativity, engineering, and problem solving. By giving students hands-on experience with design-to-production workflows, laser cutting helps bridge the gap between theory and practice.
Why Laser Cutting Matters in Education
Education is increasingly focused on real-world skills. Laser cutting teaches students to:
Translate digital designs into physical objects.
Understand material properties and limitations.
Apply STEM concepts in a practical way.
Work iteratively, testing and refining ideas quickly.
This combination of technical and creative learning makes laser cutters valuable in classrooms across disciplines.
How Schools Use Laser Cutting
STEM Programs
Engineering and technology classes use laser cutters to build models, test mechanisms, and design prototypes. Students learn CAD skills alongside fabrication.
Art and Design
Graphic design and fine arts programs use lasers for engraving, stencils, and custom pieces. It expands creative possibilities while teaching digital design tools.
Architecture
Laser cutters allow students to create scale models with precise details, enhancing their understanding of structural design.
Makerspaces
Community and school makerspaces give students access to equipment they wouldn’t normally afford, encouraging experimentation and entrepreneurship.
Benefits for Students
Immediate Feedback: Students see their designs come to life in minutes.
Collaboration: Group projects encourage teamwork and shared problem solving.
Confidence Building: Success in making tangible projects boosts motivation.
Career Readiness: Prepares students for industries that already rely on digital fabrication.
Challenges in Education
While valuable, laser cutting in schools comes with challenges:
Cost of Equipment: Industrial machines can be expensive.
Maintenance: Machines require regular upkeep and calibration.
Safety: Proper training and ventilation are essential.
Curriculum Integration: Teachers must align projects with learning goals.
The Future of Laser Cutting in Education
As costs come down, more schools are likely to adopt laser cutters. Advances in user-friendly software and safer machine designs will make them even more accessible. Future trends include cloud-based design sharing, AI-optimized workflows, and integration with 3D printing for hybrid learning experiences.
Questions & Answers
Q1: Why should schools invest in laser cutting?
A: It builds practical skills in design, engineering, and creativity while preparing students for modern industries.
Q2: What subjects benefit most from laser cutting?
A: STEM, art, design, and architecture programs benefit the most.
Q3: Is laser cutting safe for students?
A: Yes, when machines are enclosed, properly ventilated, and students receive safety training.
Q4: How expensive is it for schools?
A: Desktop machines can be a few thousand dollars, while industrial systems cost more but can be shared in makerspaces.
Q5: What’s next for laser cutting in education?
A: Expect wider adoption, AI-driven design tools, and integration with other digital fabrication technologies.
DIY Laser Cutting
DIY Laser Cutting: The Ultimate Hands-On Fabrication Experience
For makers, artists, and engineers who prefer to keep their hands on the controls, American Laser Cutter offers a premier DIY laser cutting experience in the heart of Los Angeles. While many fabrication shops require you to hand off your files and wait days for a result, our workshop is built on the philosophy of open access: you design it, you cut it.
Why Choose DIY Over Full-Service?
Doing it yourself isn't just about saving money—it's about creative control.
Instant Iteration: Did your prototype come out 1mm too wide? In a DIY session, you can adjust your vector file and cut a corrected version immediately, saving weeks of back-and-forth emails.
Precision Tweaking: You have full control over speed and power settings. Whether you want a deep, dark engraving or a light surface mark, you can test and dial in the perfect look on the fly.
Speed: No queues. No rush fees. Just book your slot, show up, and get to work.
Professional Tools for Personal Projects
"DIY" doesn't mean "amateur equipment." When you rent time at our studio, you are using the same industrial machinery used by professional prop studios and architectural firms.
High-Power Systems: Our 100W+ CO₂ lasers cut faster and cleaner than home-grade diode lasers, easily slicing through 1/4" acrylic or 3/8" plywood.
Massive Work Area: With 48" x 60" cutting beds, you aren't limited to small trinkets. You can fabricate full-scale furniture parts, large signage, or entire costume armor sets in one go.
Industry-Standard Software: We use LightBurn, giving you robust control over your layers and cut paths.
What You Need to Get Started
We make the process simple for first-time users:
Orientation: All new DIYers complete a mandatory safety check to learn the machine basics and shop rules.
Files: Bring your designs in .AI, .DXF, or .PDF format.
Materials: Bring your own laser-safe materials (wood, paper, acrylic, leather) or purchase stock from us on-site. Strictly no PVC or Vinyl.
Visit Our Workshop
Take your projects into your own hands. Whether you are a student finishing a model or a startup building a prototype, our DIY laser cutting service gives you the power to create on your terms.
Address: 1319 South Los Angeles St, Los Angeles, CA 90015
Book Your Session: americanlaserco@gmail.com | 213-866-4738
The Art of Wood Inlay: Crafting Multi-Toned Christmas Scenes
The Art of Wood Inlay: Crafting Multi-Toned Christmas Scenes
Wood inlay, or marquetry, is a sophisticated technique that uses contrasting colors and grains of wood to create detailed, multi-toned images. With a laser cutter, this process—once reserved for master craftsmen—becomes highly accessible, allowing you to create stunning, heirloom-quality Christmas ornaments, signs, and cutting boards.
This guide focuses on the principle of cutting and fitting two pieces of contrasting material without relying on complex kerf offsets.
Key Materials and Preparation
The secret to a beautiful inlay lies in high-contrast wood selection.
Background Material (The Pocket): This is the main piece of wood that will have an area engraved out to receive the inlay. Choose a light wood like Maple, Basswood, or light-toned Plywood (Source: Laser Engraving Wood: Ultimate Guide 2025 - OneLaser).
Inlay Material (The Fill): This piece should be thin—typically wood veneer or a piece of thin hardwood (about 1/16" to 1/8" thick)—in a contrasting dark color like Walnut or Cherry (Source: Intricate Wood Inlays Made Super Easy : 7 Steps (with Pictures) - Instructables).
The Glue: Use standard Wood Glue for a strong bond. For faster assembly, some crafters use CA glue (cyanoacrylate) to drastically reduce waiting time (Source: Easy inlays with Lightburn and laser).
The Laser Inlay Process: Engraving and Cutting
The classic technique involves engraving a pocket deep enough to receive a piece of veneer cut to the exact same size.
1. Preparing the Design File
You will need two versions of your design: one for the pocket and one for the inlay piece.
Pocket Design (Engrave): Use a Fill setting to deeply engrave the negative space (the background) into your main piece of wood. The depth should match the thickness of your veneer (Source: Wood Inlay Cutting Board - Epilog Laser).
Inlay Design (Cut): Use a Vector Cut setting to cut the individual pieces of your design (e.g., the stars, snowflakes, or trees) from the contrasting veneer. Important: The inlay piece design must be a mirror image of the engraved pocket design to ensure a perfect fit when flipped and inserted (Source: How to Create INSANE Wooden Inlays With a Laser - Full Tutorial - YouTube).
2. Protecting the Inlay Pieces
A common technique is to cover the front (good side) of your thin veneer with Blue Painter's Tape before cutting. This prevents smoke damage and, more importantly, keeps all the tiny pieces aligned when you remove them from the machine (Source: Easy Method to Do Laser Cut Wood Inlay - Instructables).
3. Assembly and Finishing
Clean the Pocket: Lightly clean the engraved pocket with denatured alcohol to remove residual char or resin. This prevents dark spots from mixing with the glue (Source: Easy Method to Do Laser Cut Wood Inlay - Instructables).
Glue and Insert: Apply wood glue to the bottom of the engraved pocket. Carefully press the pre-cut inlay pieces into the pocket. Apply clamps or heavy weights to ensure a tight, even fit while the glue dries.
Level and Finish: Once dry, lightly sand the entire surface flat to remove any residue and ensure the inlay is flush with the background wood. Finish with wood oil or lacquer for protection and to enhance the contrast between the woods (Source: Wood Inlay Cutting Board - Epilog Laser).
This technique is perfect for creating holiday-themed gifts like an Inlaid Family Name Ornament or a Multi-Toned Nativity Scene.
How Laser Cutting Beats CNC for Precision Design
How Laser Cutting Beats CNC for Precision Design
Why Designers Are Choosing Light Over Blades
CNC routers and CO₂ lasers are both powerful fabrication tools—but when accuracy, edge quality, and intricate detail matter, laser cutting comes out ahead. Instead of relying on physical force, the laser uses focused light to vaporize material with near-microscopic precision. The result: smoother edges, cleaner geometry, and faster production with less post-processing.
1. Precision and Detail
Laser cutting excels where CNC struggles—fine detail, sharp internal corners, and small lettering.
The focused beam can cut details smaller than 0.1 mm.
No mechanical toolpath limitations or bit radius.
Perfect for intricate patterns, signage, and design prototypes.
CNC routers, by contrast, are limited by bit size and tool flex. Every corner has a radius equal to the cutter diameter, making tight internal geometry impossible without manual finishing.
2. Clean, Polished Edges
A properly tuned CO₂ laser produces flame-polished edges on acrylic and smooth, sealed lines on wood. There’s no chipping, splintering, or need for sanding.
CNC cutting leaves tool marks and requires cleanup—especially on soft or brittle materials. Over time, dull bits and vibration introduce small variations that lasers completely avoid.
3. Faster Turnaround and Lower Maintenance
Lasers require no physical contact, meaning no tool wear, no bit changes, and minimal setup time.
Jobs switch instantly between materials with new settings.
No fixturing beyond flat placement.
Far fewer moving parts to maintain or replace.
That translates into faster production cycles and higher consistency across runs.
4. Broader Material Compatibility
CNC routers are ideal for metals, MDF, or dense hardwoods—but lasers dominate in:
Acrylic and plastics
Plywood and veneers
Paperboard and cardboard
Leather and textiles
Lasers handle delicate materials that CNC tools would tear apart. Combined with the right power settings and air assist, even complex mixed-material jobs are achievable with minimal waste.
5. Digital Efficiency
Modern laser software like LightBurn integrates vector-based precision directly from design files, eliminating manual pathing or tool compensation. This creates a faster, more efficient workflow between CAD and production—no tool libraries, feeds, or speeds to manually calculate.
Professional Laser Cutting You Can Trust
At American Laser Cutter, we use industrial CO₂ systems up to 4’×5’ in size, combining high wattage and fine-tuned optics for production-quality results. Our technicians handle everything from single prototypes to large runs with consistent accuracy and minimal turnaround time.
We can process AI, DXF, or PDF files, and clients are welcome to provide their own laser-safe materials for custom projects.
Conclusion
When precision, detail, and efficiency matter, laser cutting outperforms CNC for most design applications. With cleaner results, lower maintenance, and faster setup, it’s the smart choice for modern fabrication.
If you’re ready to bring your project to life with professional-grade precision, American Laser Cutter can help—on-site in Los Angeles or remotely anywhere in the U.S.
Email americanlaserco@gmail.com or visit americanlaserco.com to request a quote today.
On-Demand Laser Service
On-Demand Laser Service in Los Angeles: Fabrication at the Speed of Business
In the fast-paced Los Angeles market, waiting days for a fabrication quote can mean missing a deadline. American Laser Cutter transforms the traditional manufacturing model with our on-demand laser service in Downtown LA. We replace long lead times and shipping delays with immediate, hourly access to professional equipment.
Why Choose On-Demand Fabrication?
Our service is built for agility. We provide a solution for when you need parts now.
Skip the Queue: Traditional job shops stack your project behind dozens of others. With our on-demand model, you book a specific time slot. When you walk in, the machine is waiting for you.
Instant Iteration: Rapid prototyping requires speed. Cut a version, test the fit, tweak your DXF file on your laptop, and cut the revision—all in a single session.
Transparent Pricing: No "rush fees" or expedited shipping costs. You simply pay a flat hourly rate for the time you use.
Industrial Equipment Ready When You Are
On-demand access doesn't mean sacrificing quality. We equip our renters with high-performance machinery capable of commercial-grade output.
High-Speed Cutting: Our 100W to 180W CO₂ laser systems are calibrated for speed, slicing through materials like 1/4" acrylic and hardwoods significantly faster than hobbyist machines.
Large Format Capability: Don't waste time breaking your design into small pieces. Our 48" x 60" cutting beds handle full sheets of architectural plywood and large signage components in one run.
Industry-Standard Workflow: We use LightBurn software to ensure seamless compatibility with your existing AI, PDF, and DXF design files.
How Our On-Demand Service Works
Getting started is simple and fast.
Book Your Slot: Schedule your session online or by phone (Mon-Fri, 10 am – 6 pm).
Arrive Ready: Bring your vector files and your materials (or buy stock from us).
Produce: After a quick safety briefing, you operate the machine yourself. You leave the shop with your finished parts in hand.
Note: We support wood, acrylic, leather, and paper. PVC, vinyl, and metals are strictly prohibited.
Get It Done Today
Stop waiting on vendors. Take control of your timeline with on-demand laser service at American Laser Cutter.
Location: 1319 South Los Angeles St, Los Angeles, CA 90015
Book Now: americanlaserco@gmail.com | 213-866-4738
LASER CUTTING RESOURCES
This website is fantastic to pick up parts for your laser cutter.
This is a fantastic replacement software for laser cutters
https://lightburnsoftware.com/
This is a link to RdWorks software
https://www.ruidacontroller.com/download/
rescue files for RDworks and lightburn (still adding files)